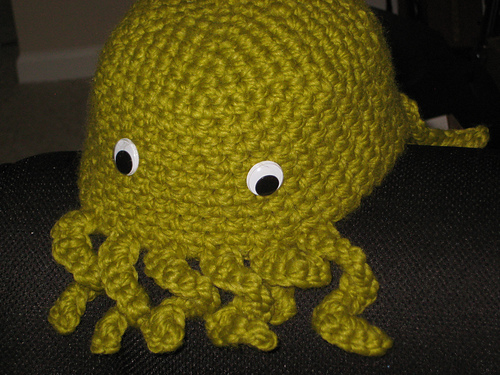
Thanks to no1pugmom on ravelry for help with the cleanup on this.

Body:
R1- I began with a magic loop
R2- 6 sc in loop or 2nd chain from hook (6 sc)
R3- Inc around (12 sc)
R4- Inc around (24 sc) (I really did double again here, I wanted it to turn out fairly flat on the bottom and it did)
R5- * Sc in next 3 sc, inc * around (30 sc)
R6- * Sc in next 4 sc, inc * around (36 sc)
R7- * Sc in next 5 sc, inc * around (42 sc)
R8- * Sc in next 6 sc, inc * around (48 sc)
R9-10- 2 rounds even. (2 x 48 = 96 sc)
R11- 6sc, [yo, pull through 1x, yo into same stitch and pull through all (twice; this is two sc of the row below)]; 3 sc and repeat [ ] section, sc remainder of row (48 stitches, with bobbles each counting as 1)
R12-23- 12 rounds even (12 x 48= 576 sc) (I also took some time to make stitches in grey yarn around the feet/bobbles to accent them before moving too far in the 12 rounds here.)
R24- 10 sc, 5 sc flo, sc remainder (Attach white yarn to the 5 front loop spaces to create fangs! You don't actually HAVE to do the flo stitches, but I found it helpful in placement.)
R25-27- 3 rounds even (3 x 48= 144 sc) (I placed the eyes at this third row.)
R28- * Sc in next 6 sc, dec * around (42 sc)
R29- * Sc in next 5 sc, dec * around (36 sc)
R30- * Sc in next 4 sc, dec * around (30 sc)
R31- * Sc in next 3 sc, dec * around (24 sc)
R32- * Sc in next 3 sc, dec * around (18 sc)
R33- * Sc in next 2 sc, dec * around (12 sc)( This is when I stuffed)
R34- Dec around (6 sc)
R35- Dec around (3sc) (I wanted an extra row to give the bat a bit of a point on his head as compared to the bottom.)
Ears:
Make two.
R1- Ch 6.
R2- Sc front loop only down chain, then go back down chain sc back loop only.
R3- Ch 1, turn, and sc back to top. Finish off.
This should give your ears a bit of a curve to them, so they look more like bat ears. You can also sew them on in a curve if they don't come out already shell-shaped.
Fangs:
Note, you'll want to leave long tails of yarn on either end to help you sew the fangs onto the face. Please read all the instructions for this section before beginning! It's unorthodox I'm sure, but it does work.
Make only one.
R1- ch 6, turn
R2.0- Go through 3rd chain from hook, yarn over and pull through, go through next chain, yarn over and pull through 2 loops on hook, yarn over and pull through all, finish off
R2.1- With long tail from other end, make a slipknot. Chain 2, yarn over and pull through at first chain of the original chain, yarn over and go through the next chain, yarn over and pull through all and finish off.
At the end of this, you should have two points with yarn dangling off them, so you can now use the ends to sew the fangs on.
Wings:
It's best to read over this whole wing pattern and the note before beginning.
This pattern of decreasing the number of big stitches by one on each row is what creates a curved wing edge. Continue until wings are large enough; this was 8 rows for me (once I began that portion fo the wing). I did two rows - one toward the middle and one back down to the edge - before decreasing the number of stitches.
Make two.
R1- Ch 21, turn
R2- Sl st into 2nd chain from hook, sc through remainder, ch 3 and turn
R3- Make 5 tr into next 5 spaces (this counts as 6 tr), make 5 dbl into next 5 spaces, make 4 hdc, sc up to the last sc in row (4sc), sl st into last sc, turn.
R4- Sl st into first sc and repeat all previous row stitches until the end of the row (that is, make a sc where there was a sc before, make a dbl where there was a dbl before, etc.)
R5- Ch 3 and sl into last tr, ch 3 in the same spot, continue with 4 tr (5 incl. chain), 4 dbl, 3 hdc, 3sc, sl into next stitch, turn.
R6- Sl st into first sc of row, sc in each of the next two, make hdc in hdc, dbl in dbl, tr in tr.
R7- Ch 3 and sl into last tr, ch 3 in same spot, continue with 3 tr (4 incl. chain), 4 dbl, 3 hdc, 2 sc, sl into last stitch, turn.
R8- Sl st into first sc of row, repeat stitches from previous row (as in rows 4 and 6).
R9- Ch 3 and sl into last tr, ch 3 in same spot, continue with 3 tr (4 incl. chain), 3 dbl, 2 hdc, 1 sc, sl into last stitch, turn.
R10- Sl st into first sc of row, make sc, 2 hdc, 2 dbl, 2 tr and finish off.
Optional: On the back side of the original chain, attach a new loop and ch 3. Make 2 tr (on back side of original chain) and finish off. Leave enough yarn to sew these tabs into the main body. (This is how I did it, but it's not strictly necessary.)